Tableau Online
Tableau Online может подключаться к ClickHouse Cloud или локальной установке ClickHouse через интерфейс MySQL, используя официальный источник данных MySQL.
Настройка ClickHouse Cloud
Select Connect your app
After creating your ClickHouse Cloud Service, on the Connect your app screen, select MySQL from the drop down.
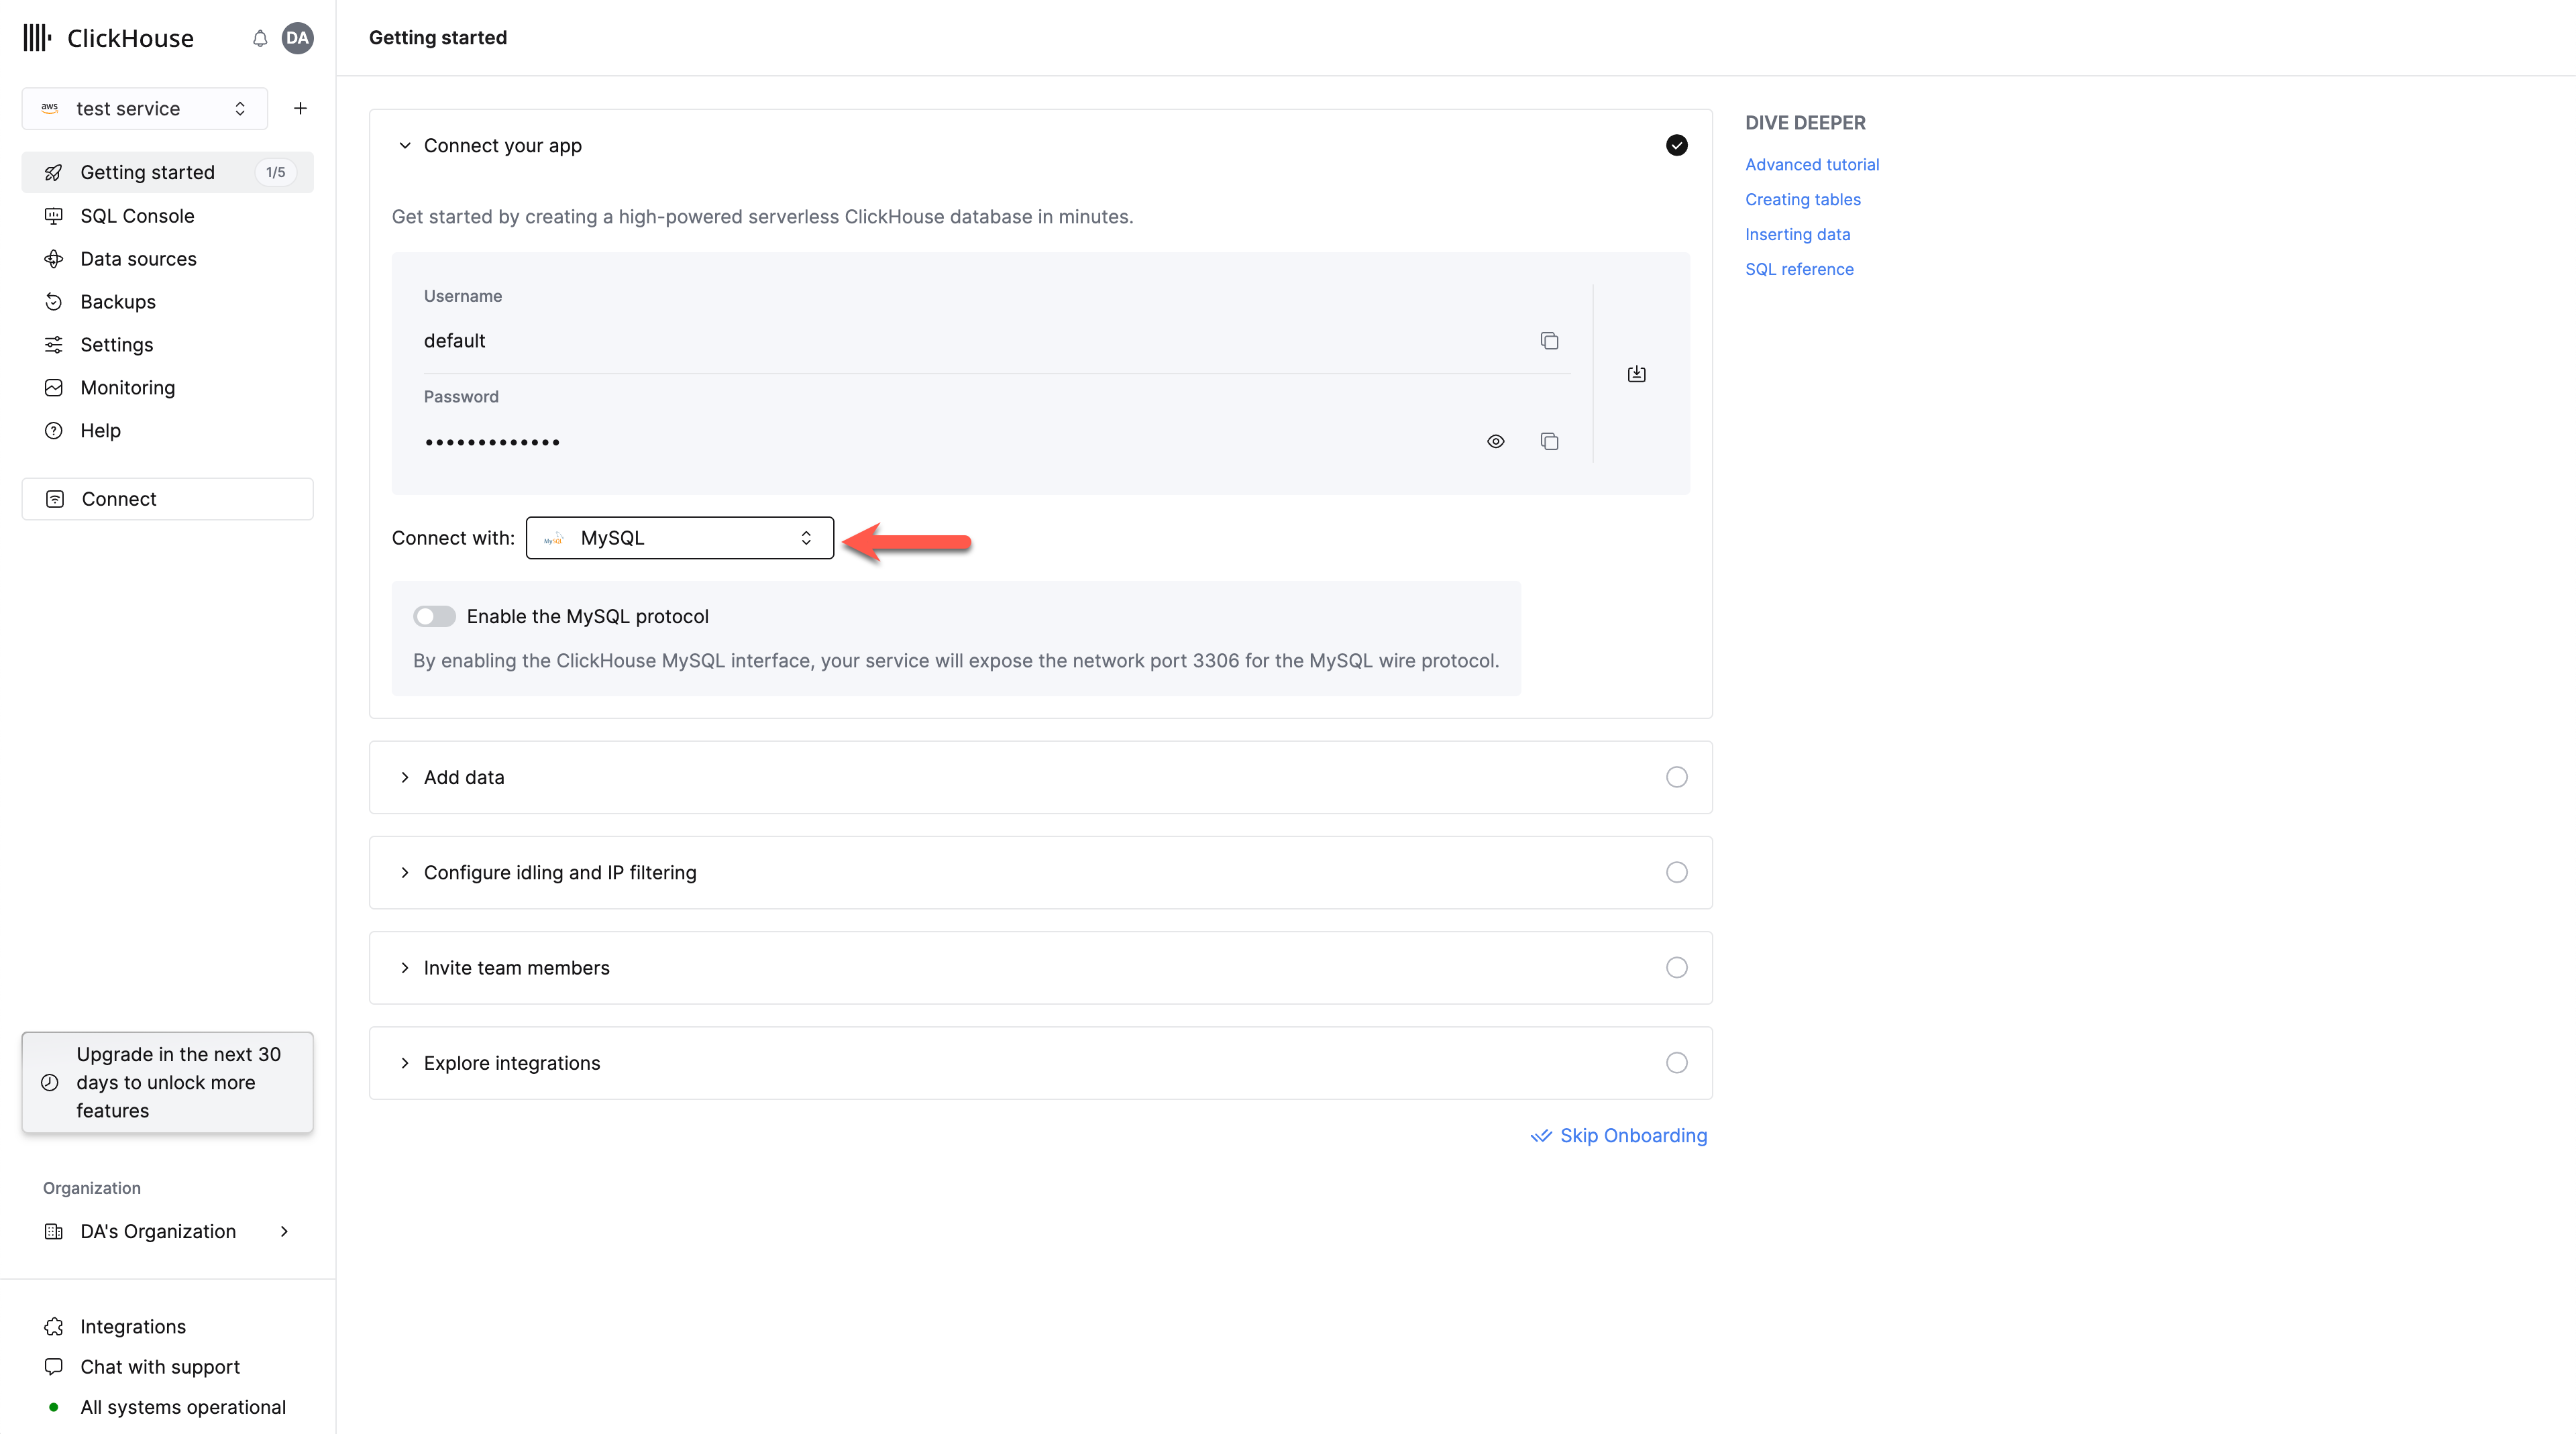
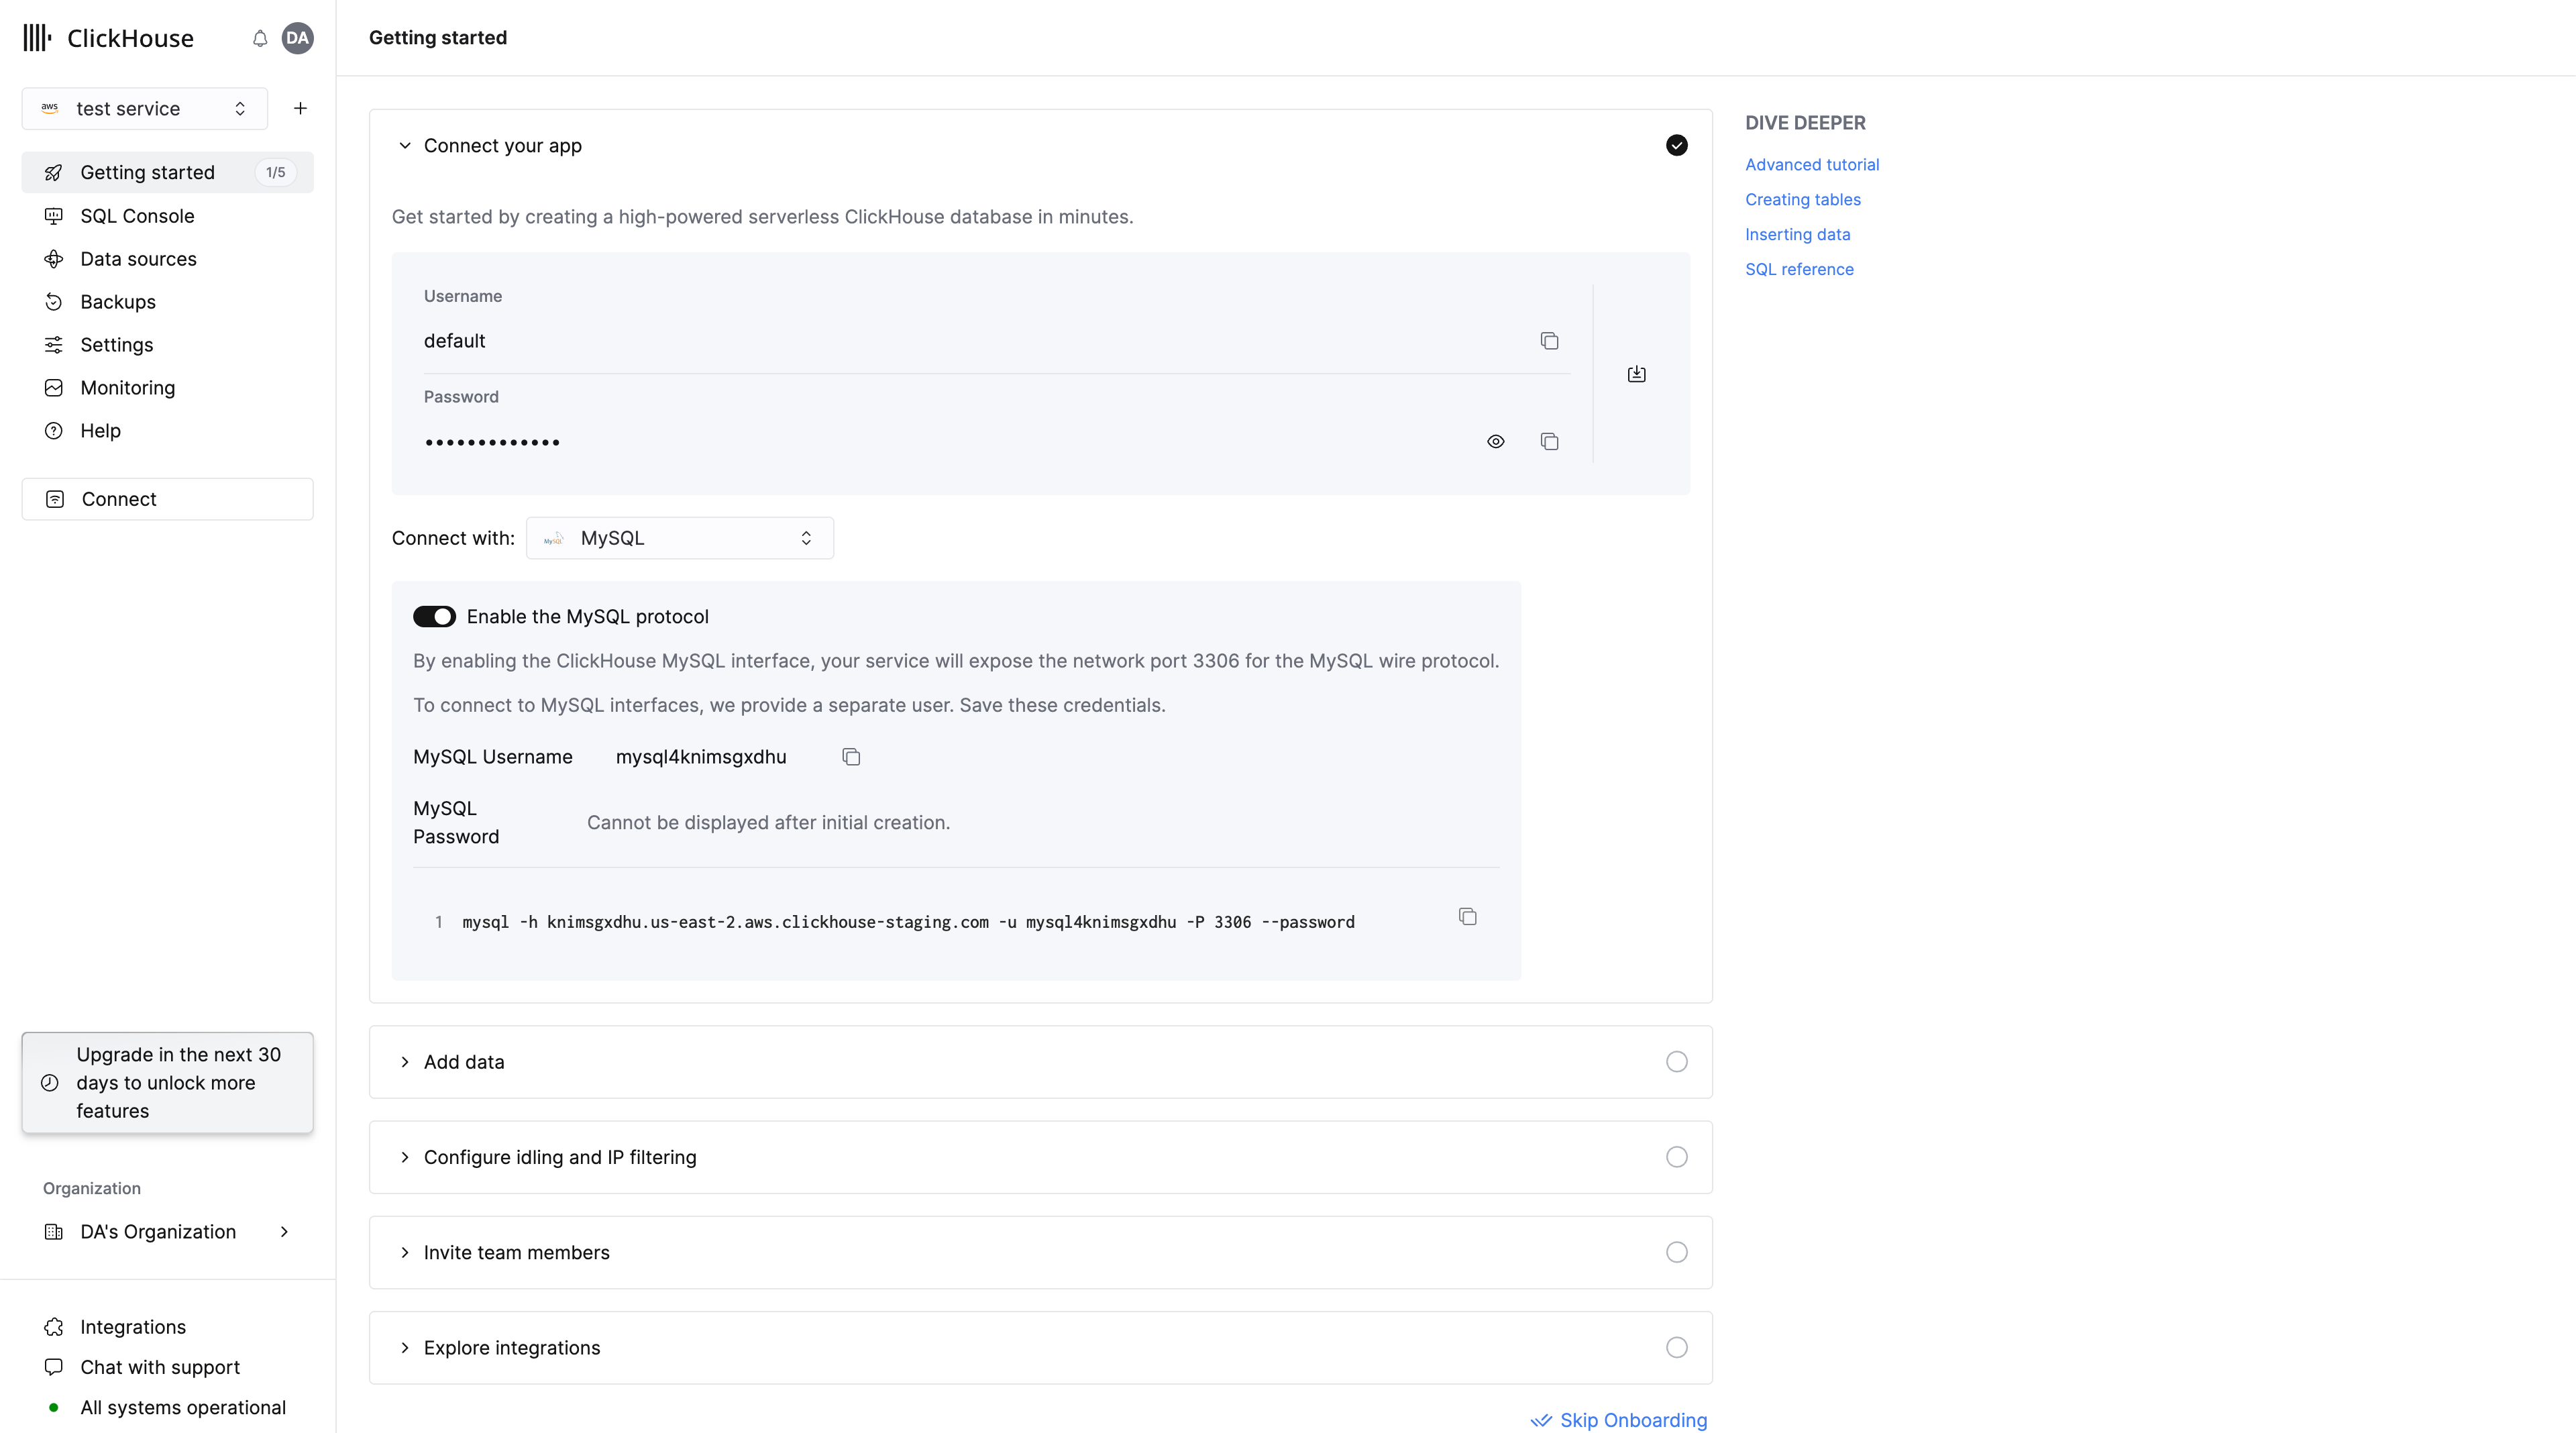
Enable the MySQL interface
Toggle the switch to enable the MySQL interface for this specific service.
This will expose port 3306 for this service and prompt you with a MySQL connection screen that includes your unique MySQL username.
Alternatively, in order to enable the MySQL interface for an existing service:
Select Connect
Ensure your service is in Running state then click on the service you want to enable the MySQL interface for.
Select "Connect" from the left menu:

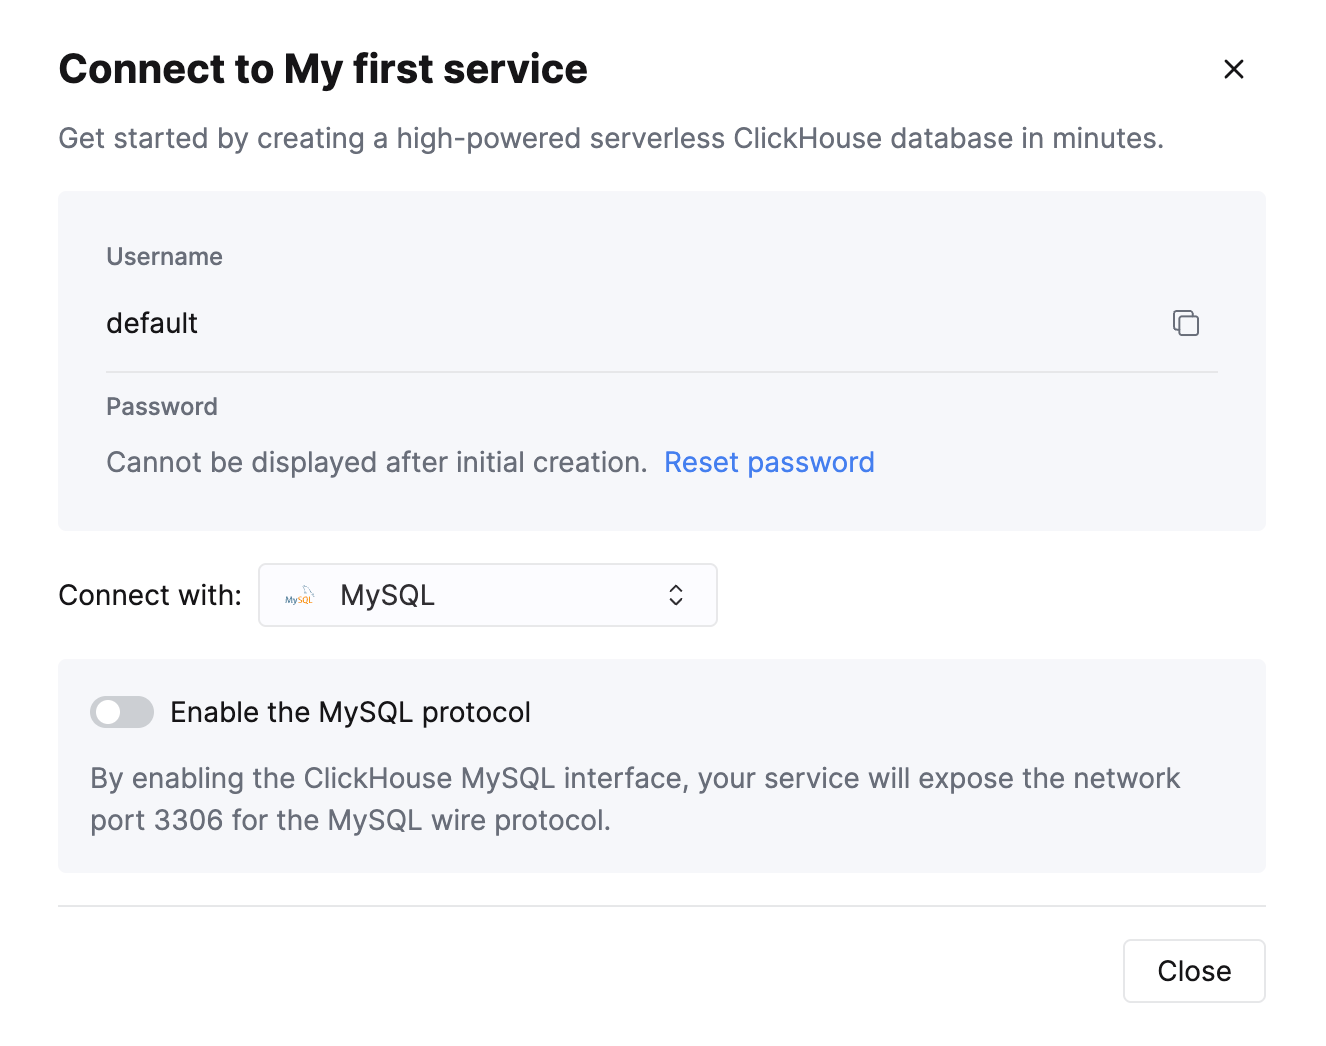
Enable the MySQL interface
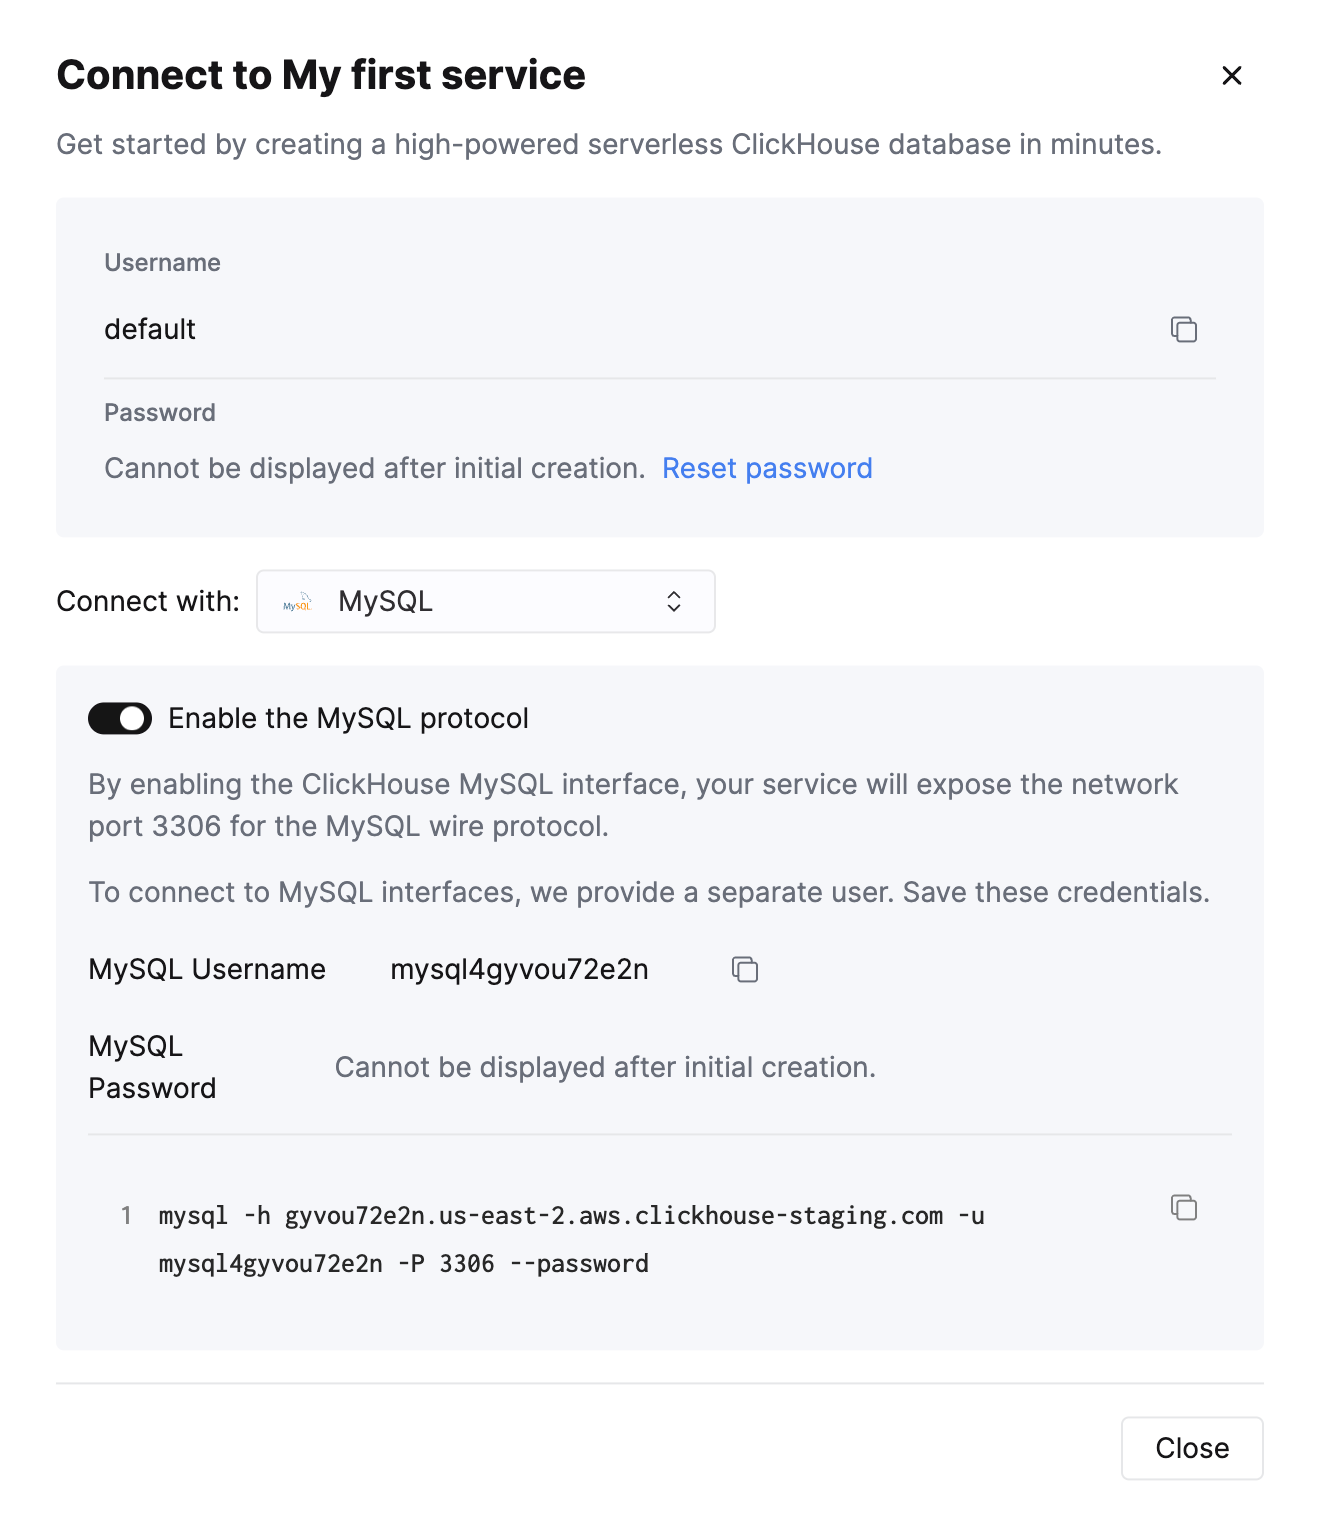
Toggle the switch to enable the MySQL interface for this specific service.
This will expose port 3306 for this service and prompt you with your MySQL connection screen that include your unique MySQL username.
Creating a readonly MySQL user in ClickHouse Cloud
ClickHouse Cloud automatically creates a mysql4<subdomain> user that shares the same password as the default user.
The <subdomain> portion corresponds to the first part of your ClickHouse Cloud hostname.
This username format is required for compatibility with tools that establish secure connections but don't include SNI (Server Name Indication) data in their TLS handshake. Without SNI information, the system cannot perform proper internal routing, so the subdomain hint embedded in the username provides the necessary routing information. The MySQL console client is an example of a tool that requires this.
A recommended best practice is to create a new readonly MySQL user.
For a ClickHouse Cloud hostname like foobar.us-east1.aws.clickhouse.cloud, the <subdomain> part equals to foobar, and a custom MySQL username could look like mysql4foobar_team1.
Create a readonly settings profile
Create a settings profile to apply to your readonly user,
setting the readonly setting to 1:
Create a new readonly MySQL user
Create a user with a name following this format:
Apply the readonly_profile to the new user and make sure that the password is in double SHA1 format. For example:
Grant the new user permissions to access the desired tables
Grant the new user the necessary permissions to interact with the desired tables or databases.
For example, if you want to grant access to system.query_log only:
For the readonly user, make sure to only grant SELECT permissions to the tables you want to access.
The newly created user can be used to connect to your ClickHouse Cloud service with the MySQL interface.
Troubleshooting multiple MySQL users in ClickHouse Cloud
If you created a new MySQL user, and you see the following error while connecting via MySQL CLI client:
In this case, ensure that the username follows the mysql4<subdomain>_<username> format, as described (above).
Настройка локального сервера ClickHouse
Please refer to the official documentation on how to set up a ClickHouse server with enabled MySQL interface.
Aside from adding an entry to the server's config.xml
it is also required to use Double SHA1 password encryption for the user that will be using MySQL interface.
Generating a random password encrypted with Double SHA1 from the shell:
The output should look like the following:
The first line is the generated password, and the second line is the hash we could use to configure ClickHouse.
Here is an example configuration for mysql_user that uses the generated hash:
/etc/clickhouse-server/users.d/mysql_user.xml
Replace password_double_sha1_hex entry with your own generated Double SHA1 hash.
Additionally, it is recommended to use use_mysql_types_in_show_columns
to show the native MySQL types instead of ClickHouse ones in SHOW [FULL] COLUMNS query results,
which allows BI tools to properly introspect the database schema when using MySQL connectors.
For example:
/etc/clickhouse-server/users.d/mysql_user.xml
or assign it to a different profile instead of the default one.
If you have the mysql binary available, you can test the connection from the commandline.
Using the sample username (mysql_user) and password (LZOQYnqQN4L/T6L0) from above the command line would be:
Finally, configure the Clickhouse Server to listen on the desired IP address(es). For example, in config.xml, uncomment out the following to listen on all addresses:
Подключение Tableau Online к ClickHouse (локально без SSL)
Войдите на свой сайт Tableau Cloud и добавьте новый опубликованный источник данных.
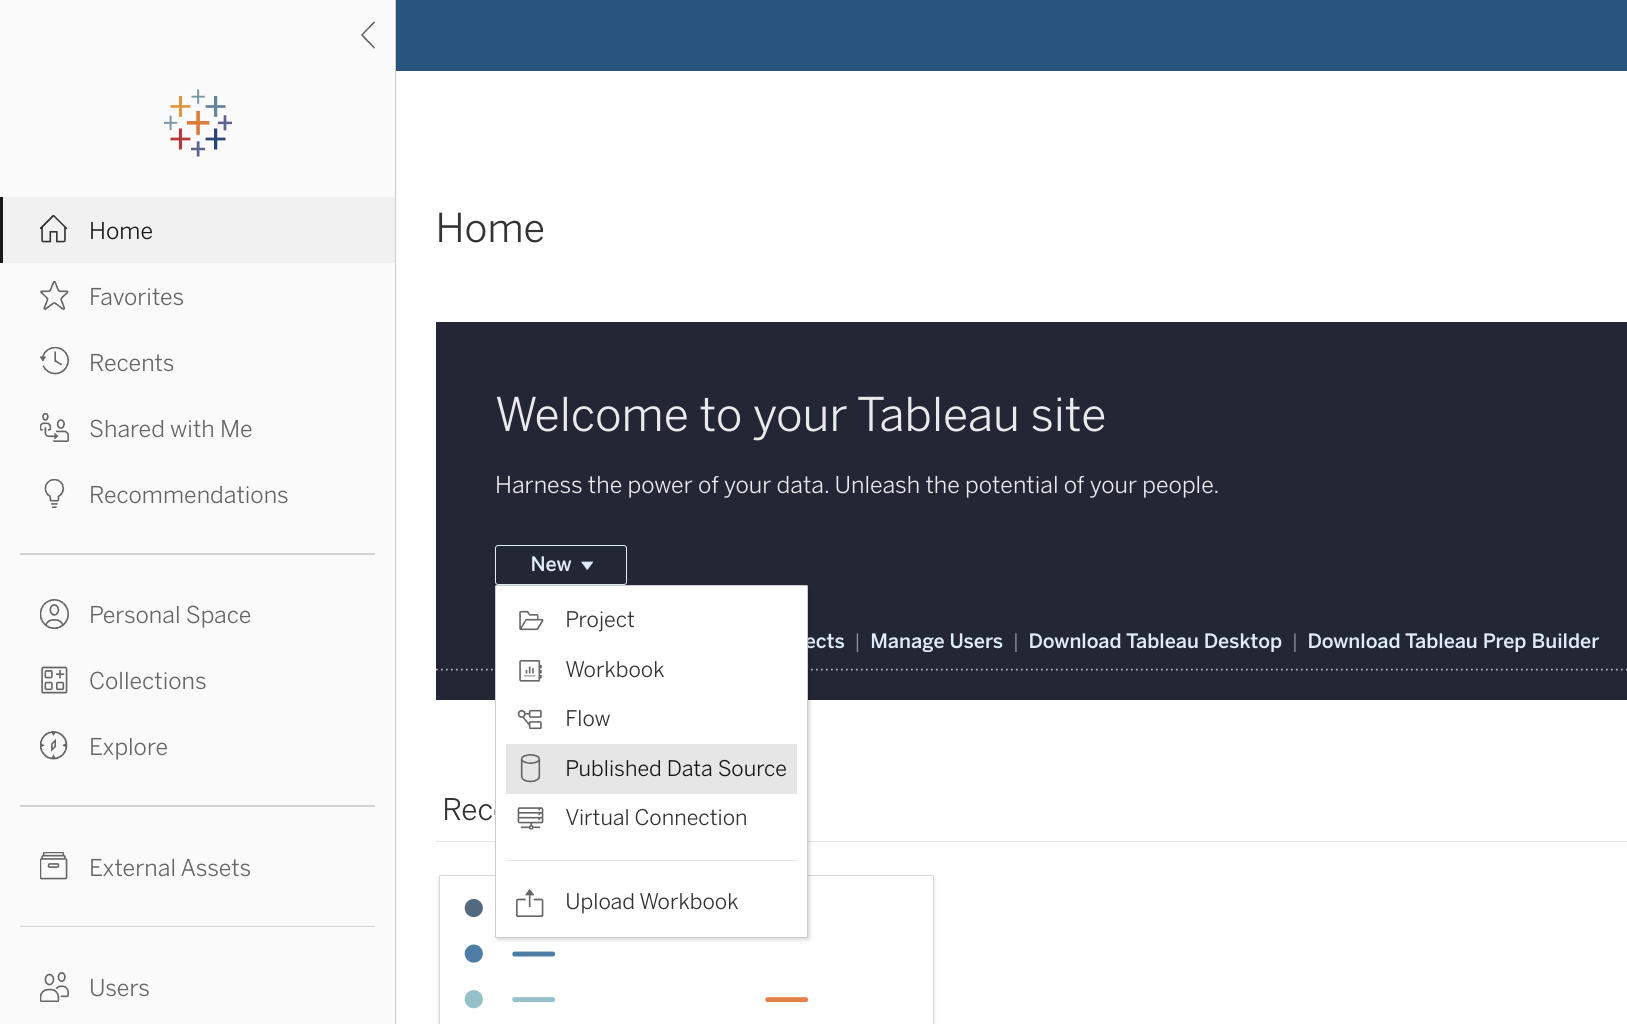
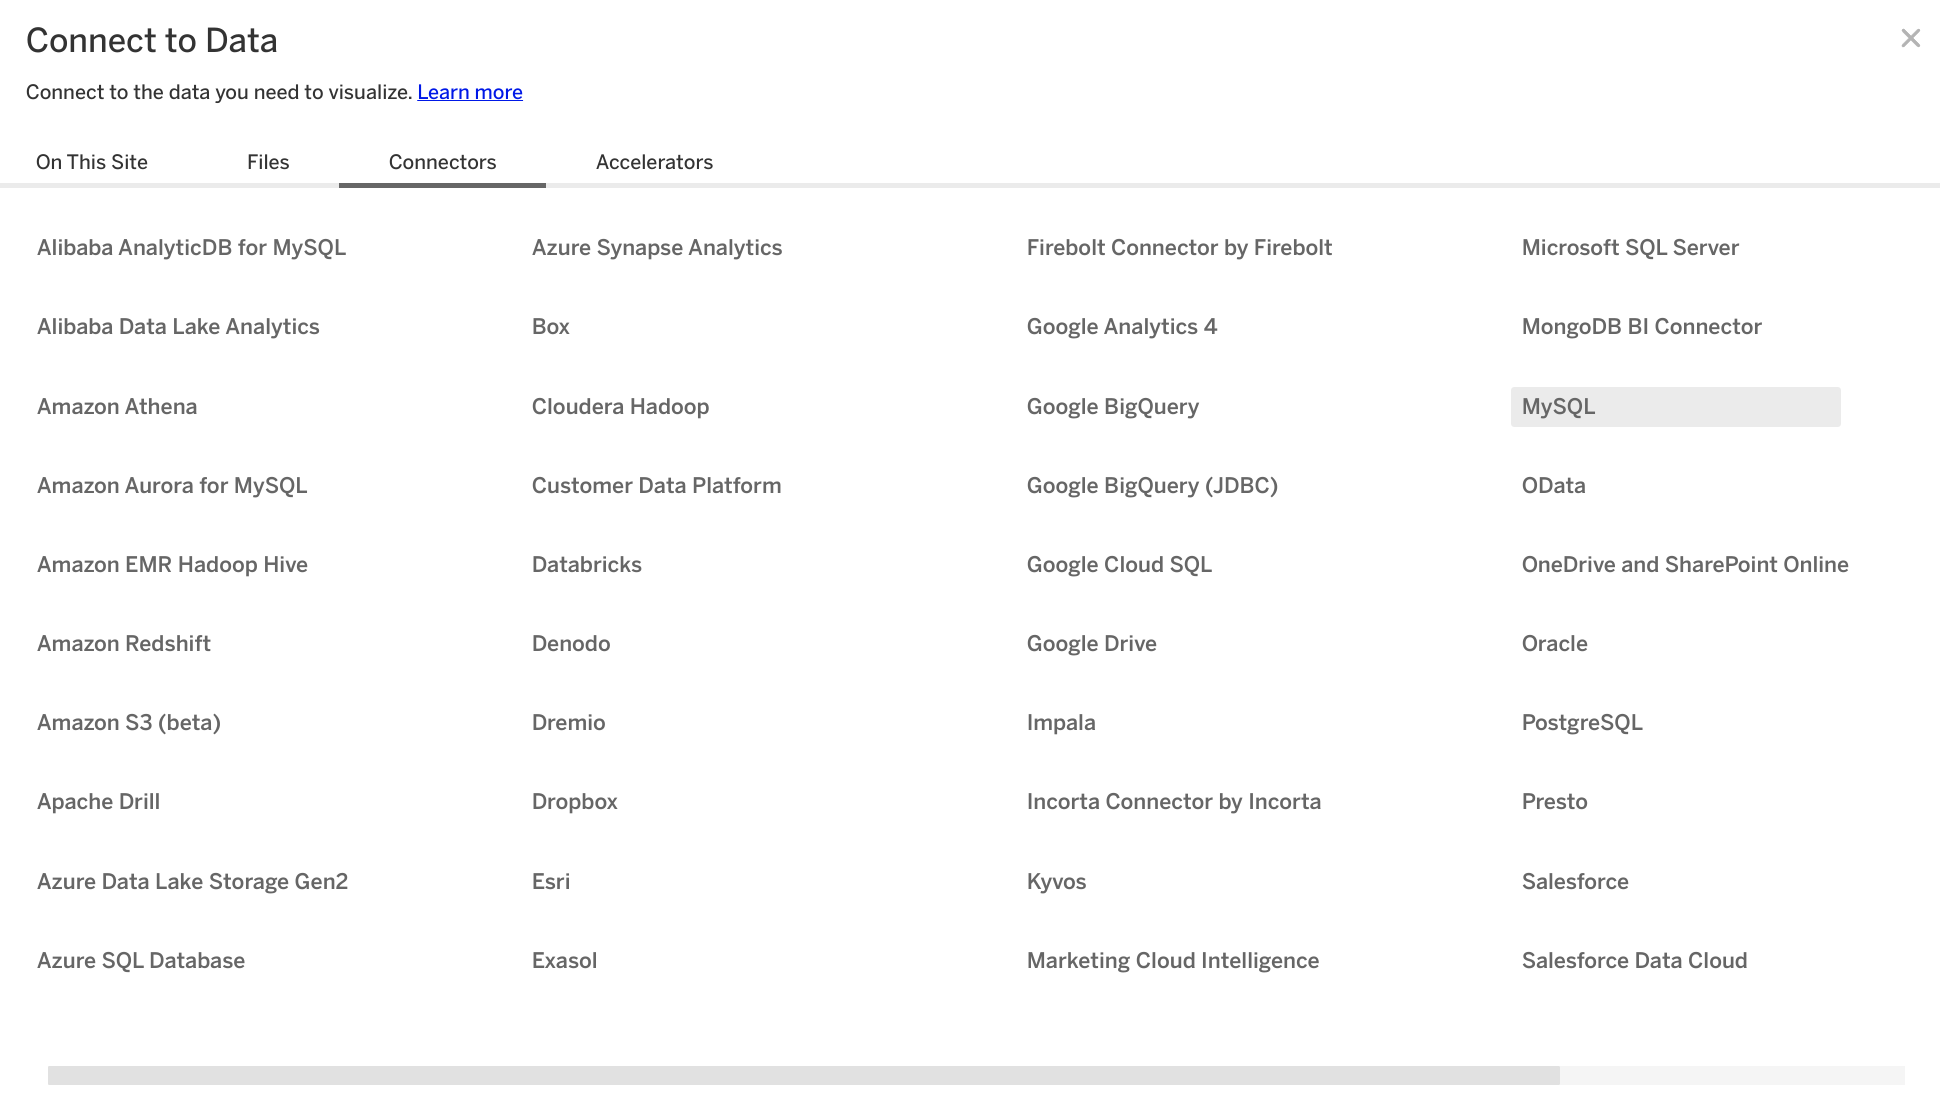
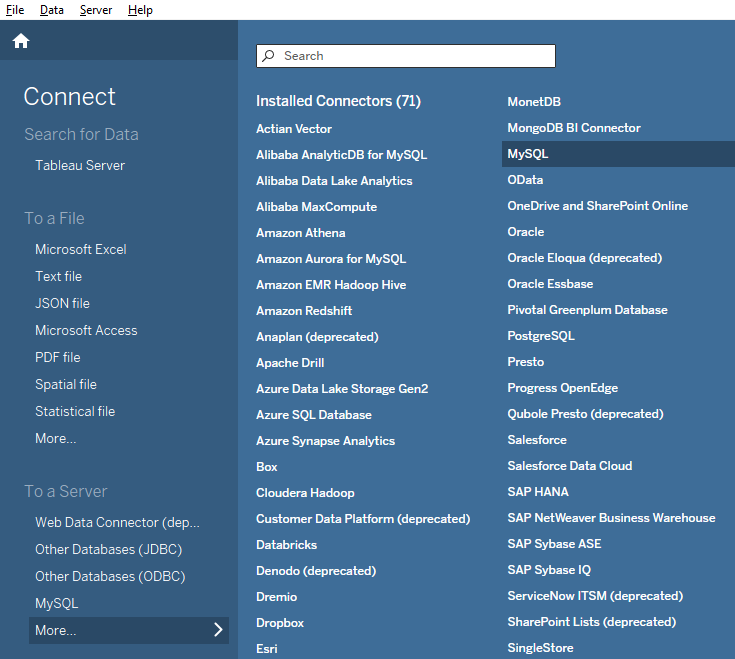
Выберите "MySQL" из списка доступных коннекторов.
Укажите данные подключения, собранные во время настройки ClickHouse.
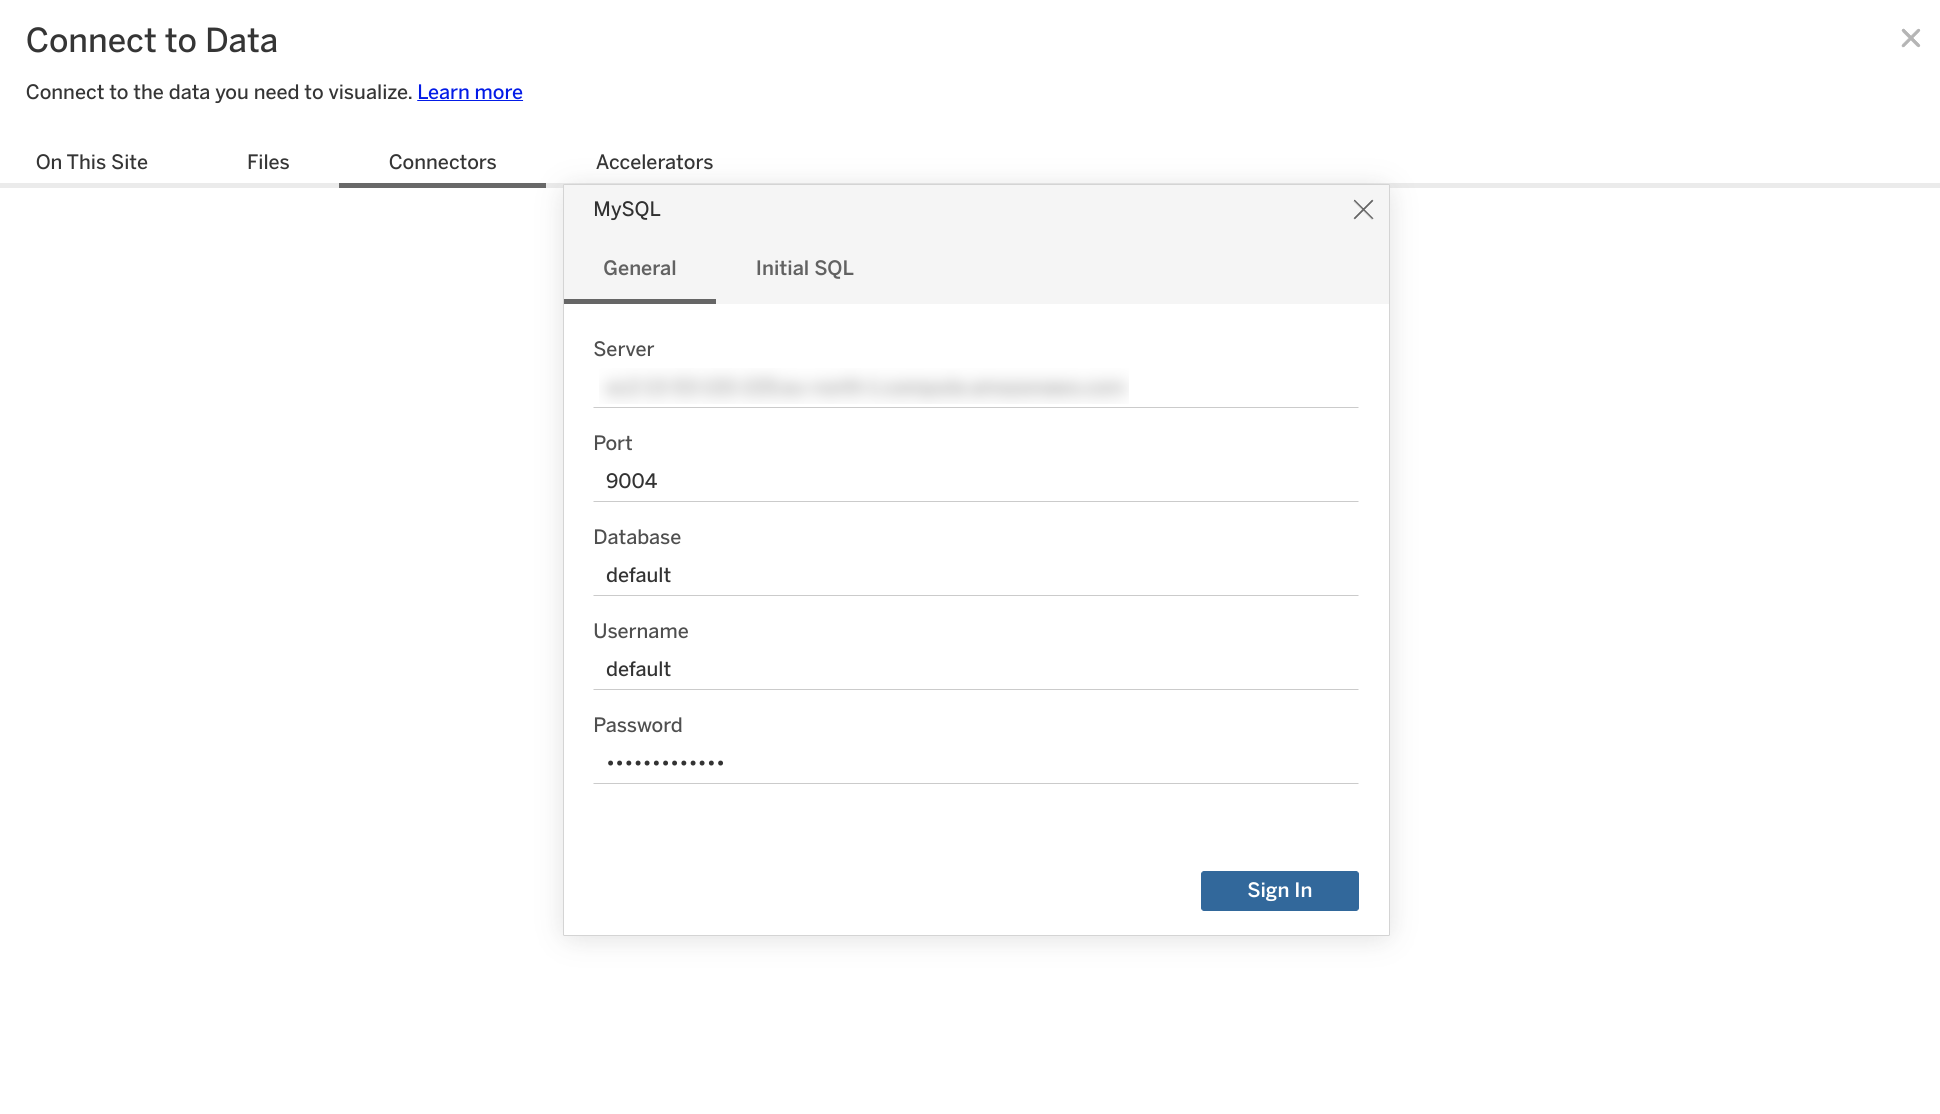
Tableau Online проведет интроспекцию базы данных и предоставит список доступных таблиц. Перетащите желаемую таблицу на холст справа. Кроме того, вы можете нажать "Обновить сейчас", чтобы просмотреть данные, а также уточнить типы или названия интроспектируемых полей.
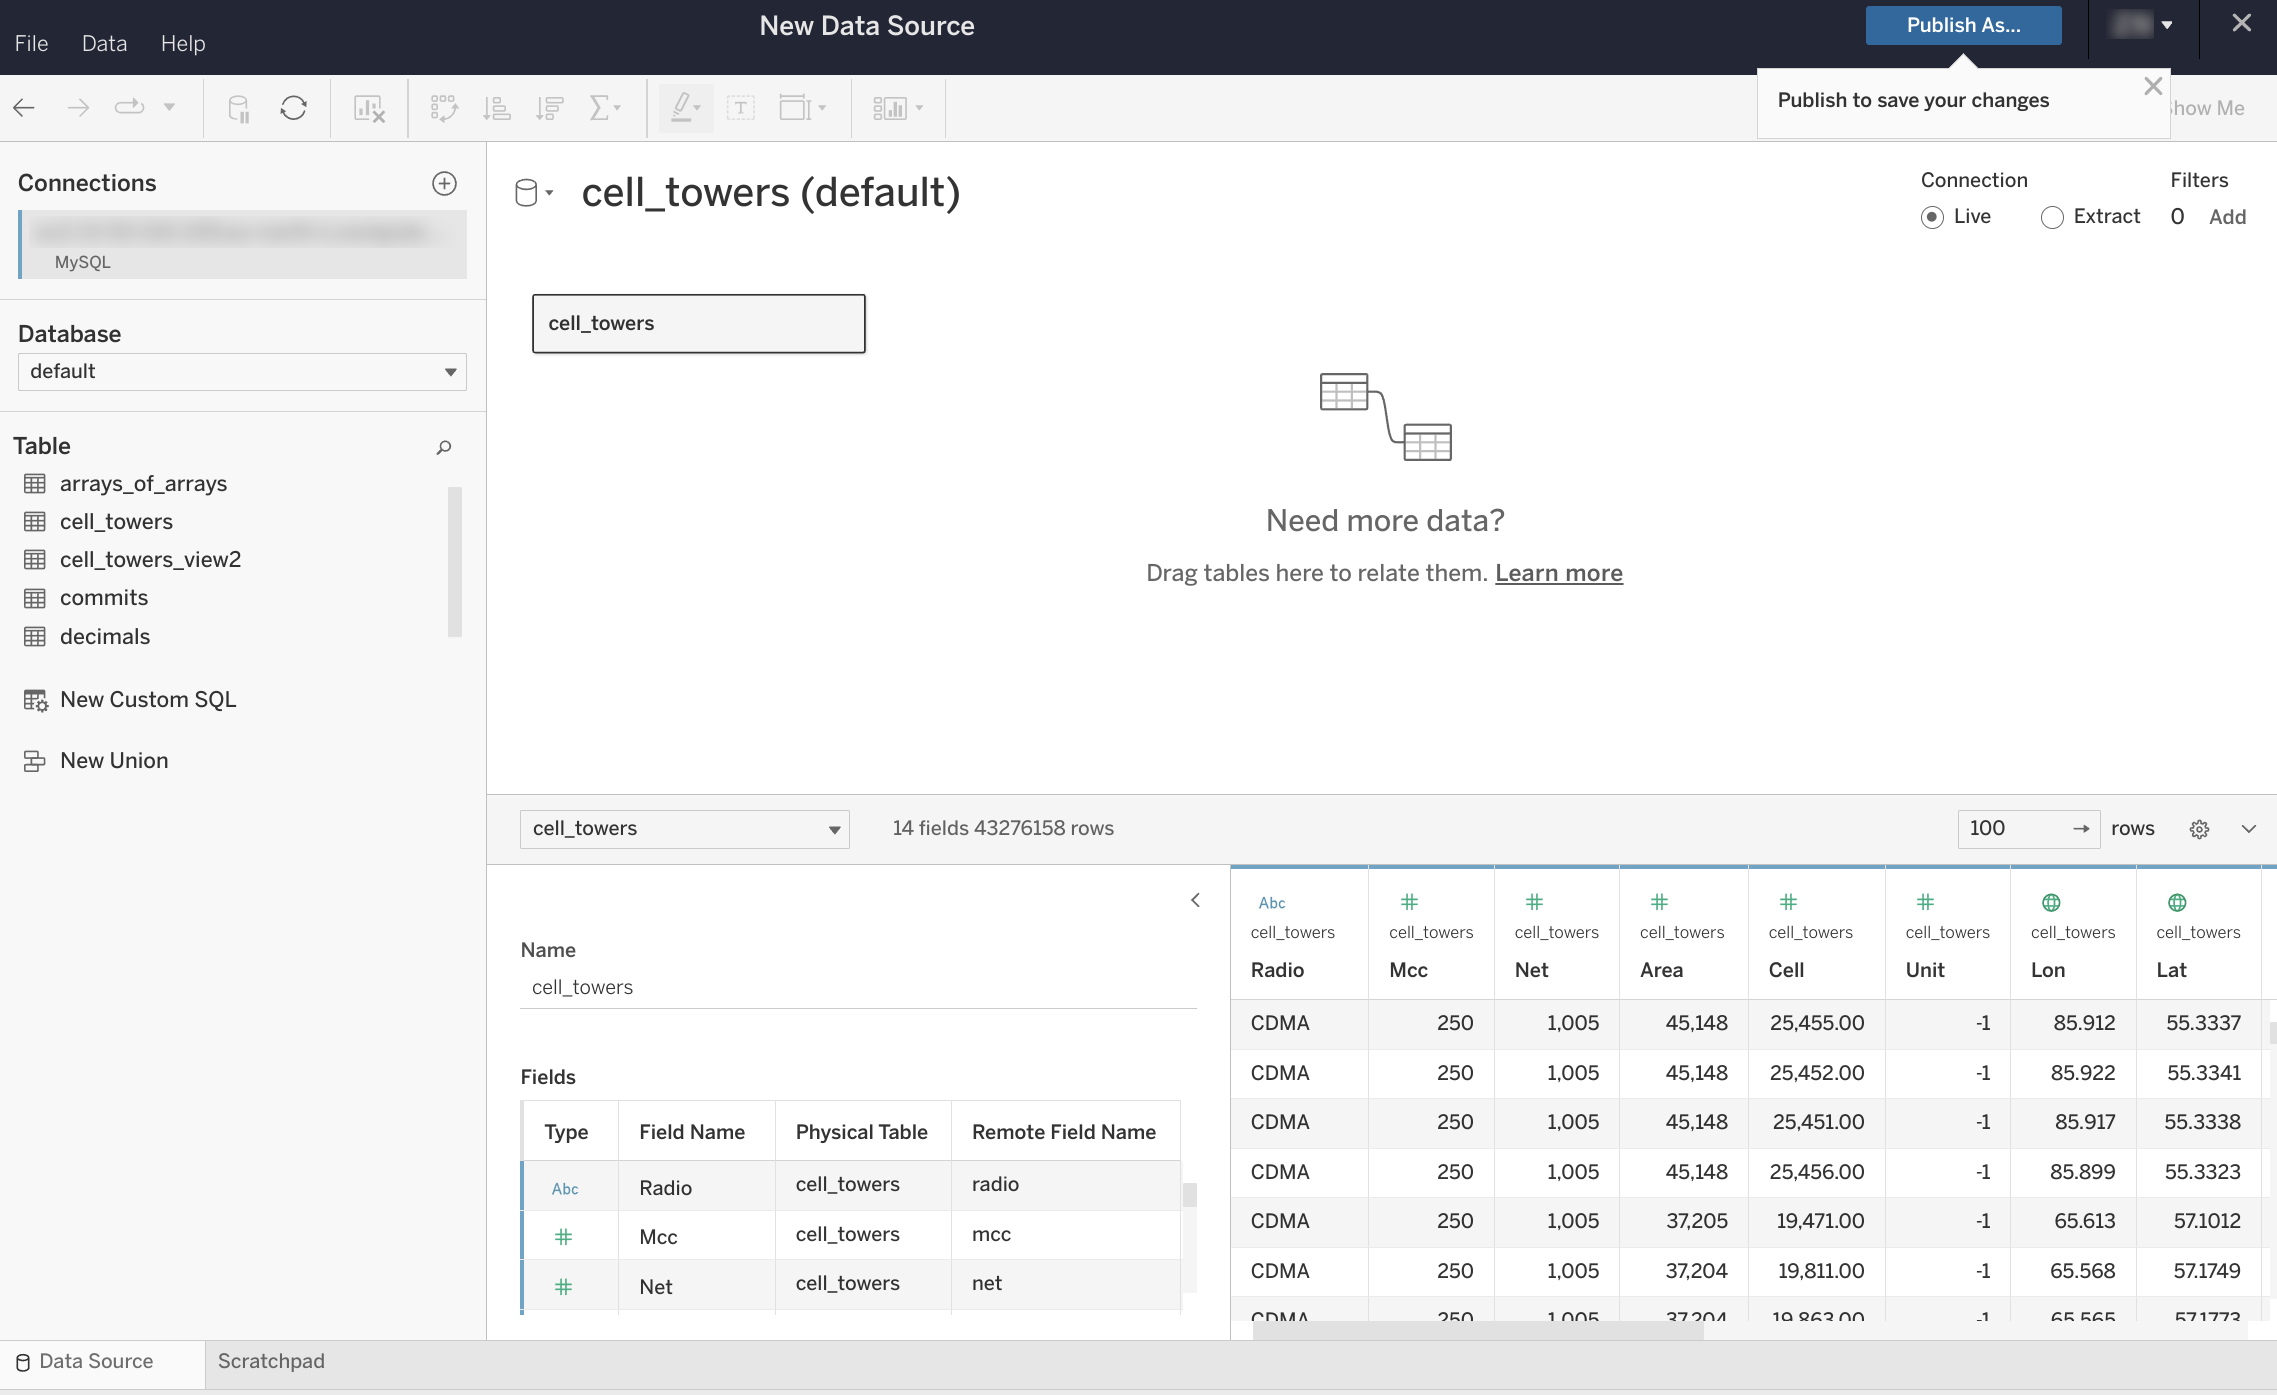
После этого остается только нажать "Опубликовать как" в правом верхнем углу, и вы сможете использовать вновь созданный набор данных в Tableau Online как обычно.
NB: если вы хотите использовать Tableau Online в комбинации с Tableau Desktop и делиться наборами данных ClickHouse между ними, убедитесь, что вы также используете Tableau Desktop с подключением MySQL по умолчанию, следуя руководству по настройке, которое отображается здесь, если вы выберете MySQL из выпадающего списка источников данных. Если у вас есть Mac с M1, проверьте эту тему по устранению неполадок для обходного пути установки драйвера.
Подключение Tableau Online к ClickHouse (Cloud или локальная установка с SSL)
Поскольку невозможно предоставить SSL-сертификаты через мастер настройки подключения MySQL Tableau Online, единственный способ — использовать Tableau Desktop для настройки подключения, а затем экспортировать его в Tableau Online. Этот процесс достаточно простой.
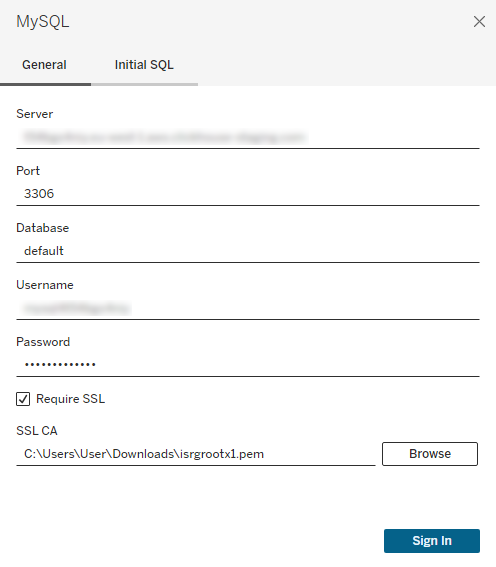
Запустите Tableau Desktop на компьютере с Windows или Mac и выберите "Подключить" -> "К серверу" -> "MySQL". Вероятно, вам потребуется сначала установить драйвер MySQL на ваш компьютер. Вы можете сделать это, следуя руководству по настройке, которое отображается здесь, если вы выберете MySQL из выпадающего списка источников данных. Если у вас есть Mac с M1, проверьте эту тему по устранению неполадок для обходного пути установки драйвера.
В интерфейсе настройки подключения MySQL убедитесь, что опция "SSL" включена. SSL-сертификат ClickHouse Cloud подписан Let's Encrypt. Вы можете скачать этот корневой сертификат здесь.
Укажите учетные данные MySQL вашего экземпляра ClickHouse Cloud и путь к загруженному корневому сертификату.
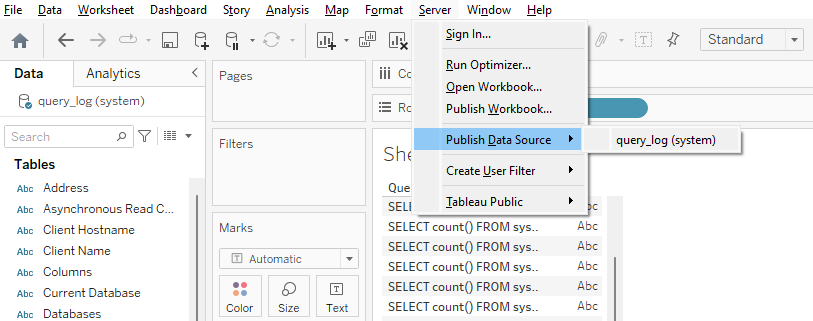
Выберите желаемые таблицы, как обычно (аналогично Tableau Online), и выберите "Сервер" -> "Опубликовать источник данных" -> Tableau Cloud.
ВАЖНО: вам нужно выбрать "Встроенный пароль" в опциях "Аутентификация".
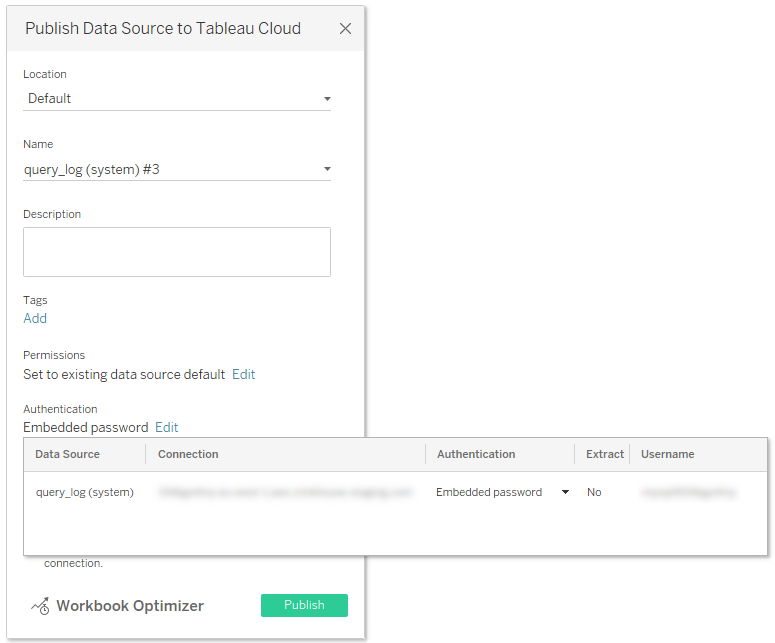
Кроме того, выберите "Обновить рабочую книгу для использования опубликованным источником данных".
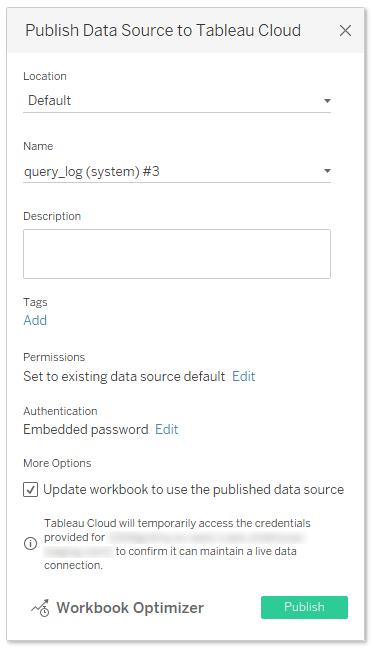
Наконец, нажмите "Опубликовать", и ваш источник данных с встроенными учетными данными автоматически откроется в Tableau Online.
Известные ограничения (ClickHouse 23.11)
Все известные ограничения были исправлены в ClickHouse 23.11. Если вы столкнетесь с какими-либо другими несовместимостями, не стесняйтесь связываться с нами или создать новую задачу.
